ThePhoblographer.com publishes a ton of great content for photographers trying to elevate their craft, or just keep up with the latest and greatest new photography gear.
Speaking of the latest, we’re super-excited that they’ve chosen to talk about our new M1w Mirrorless Wrist Strap.
So you want to make a paracord camera wrist strap. Great! We love DIY. It’s how Simplr began — making one strap for myself.
A Short Rant on What’s Wrong with Most Camera Wrist Straps (opinionated)
Just as our camera straps are a little “different”, so too is our suggestion for a DIY paracord wrist strap — and if you use a mirrorless, micro four-thirds or compact camera, you’ll find this article particularly relevant.
Commercial wrist straps tend to be overly complicated and bulky — more focused on looks than function. At Simplr we’re all about getting rid of excess bulk — and if you’ve got a smaller camera, why would you want a wrist strap as thick or inflexible as a garden hose? It’s just silly.
When to Use a Camera Wrist Strap (highly opinionated)
We like camera wrist straps for two things:
Cameras that are too small for a neck strap: If you’ve got a pocketable camera, like a Ricoh GR — you don’t absolutely need a neck strap (there’s a good chance you’re here because you already know this). A wrist strap can be much better-suited to these really small cameras.
For occasions when a neck strap is superfluous: Maybe you’re shooting handheld video. Maybe you’re in the studio or just shooting stuff around the house. These are times when a neck strap is superfluous … but you’ll still want a little insurance policy to guard against drops
Don’t be that guy or girl, swinging your big camera from your wrist as you stroll along, as if it were some kind of pendulum:
“Hey, I don’t remember that scratch/ding on there,” –or– “What the heck happened to my lens?”
Your camera should be in your hand most of the time. There’s no reason to be hanging six pounds off your wrist all day. Your wrist strap should be your insurance policy against drops.
… Voila, this (less bulky) paracord camera wrist strap.
What We’ll be Making
A non-braided paracord camera wrist strap with a quick-release — a nice, utilitarian design that’s strong enough for a DSLR, yet packs small. You don’t need much to make it, and the total time is about 20 minutes. Once finished, you’ll have a very useful accessory that takes up virtually no space in your camera bag.
Paracord Camera Wrist Strap Materials
550 Paracord — available from Lowes, Home Depot and about about a zillion places.
Scissors or Sharp Knife (No, we’re not responsible if you cut yourself.)
Lighter or Matches (Don’t burn yourself either.)
How to Make It
Figure out how big to make the loop. Your preference may vary, but around 8″ would be a good starting point. Paracord is cheap and plentiful so there’s no reason to obsess over this … You can always make one that’s bigger or smaller if you’re not happy with the size of the first one.
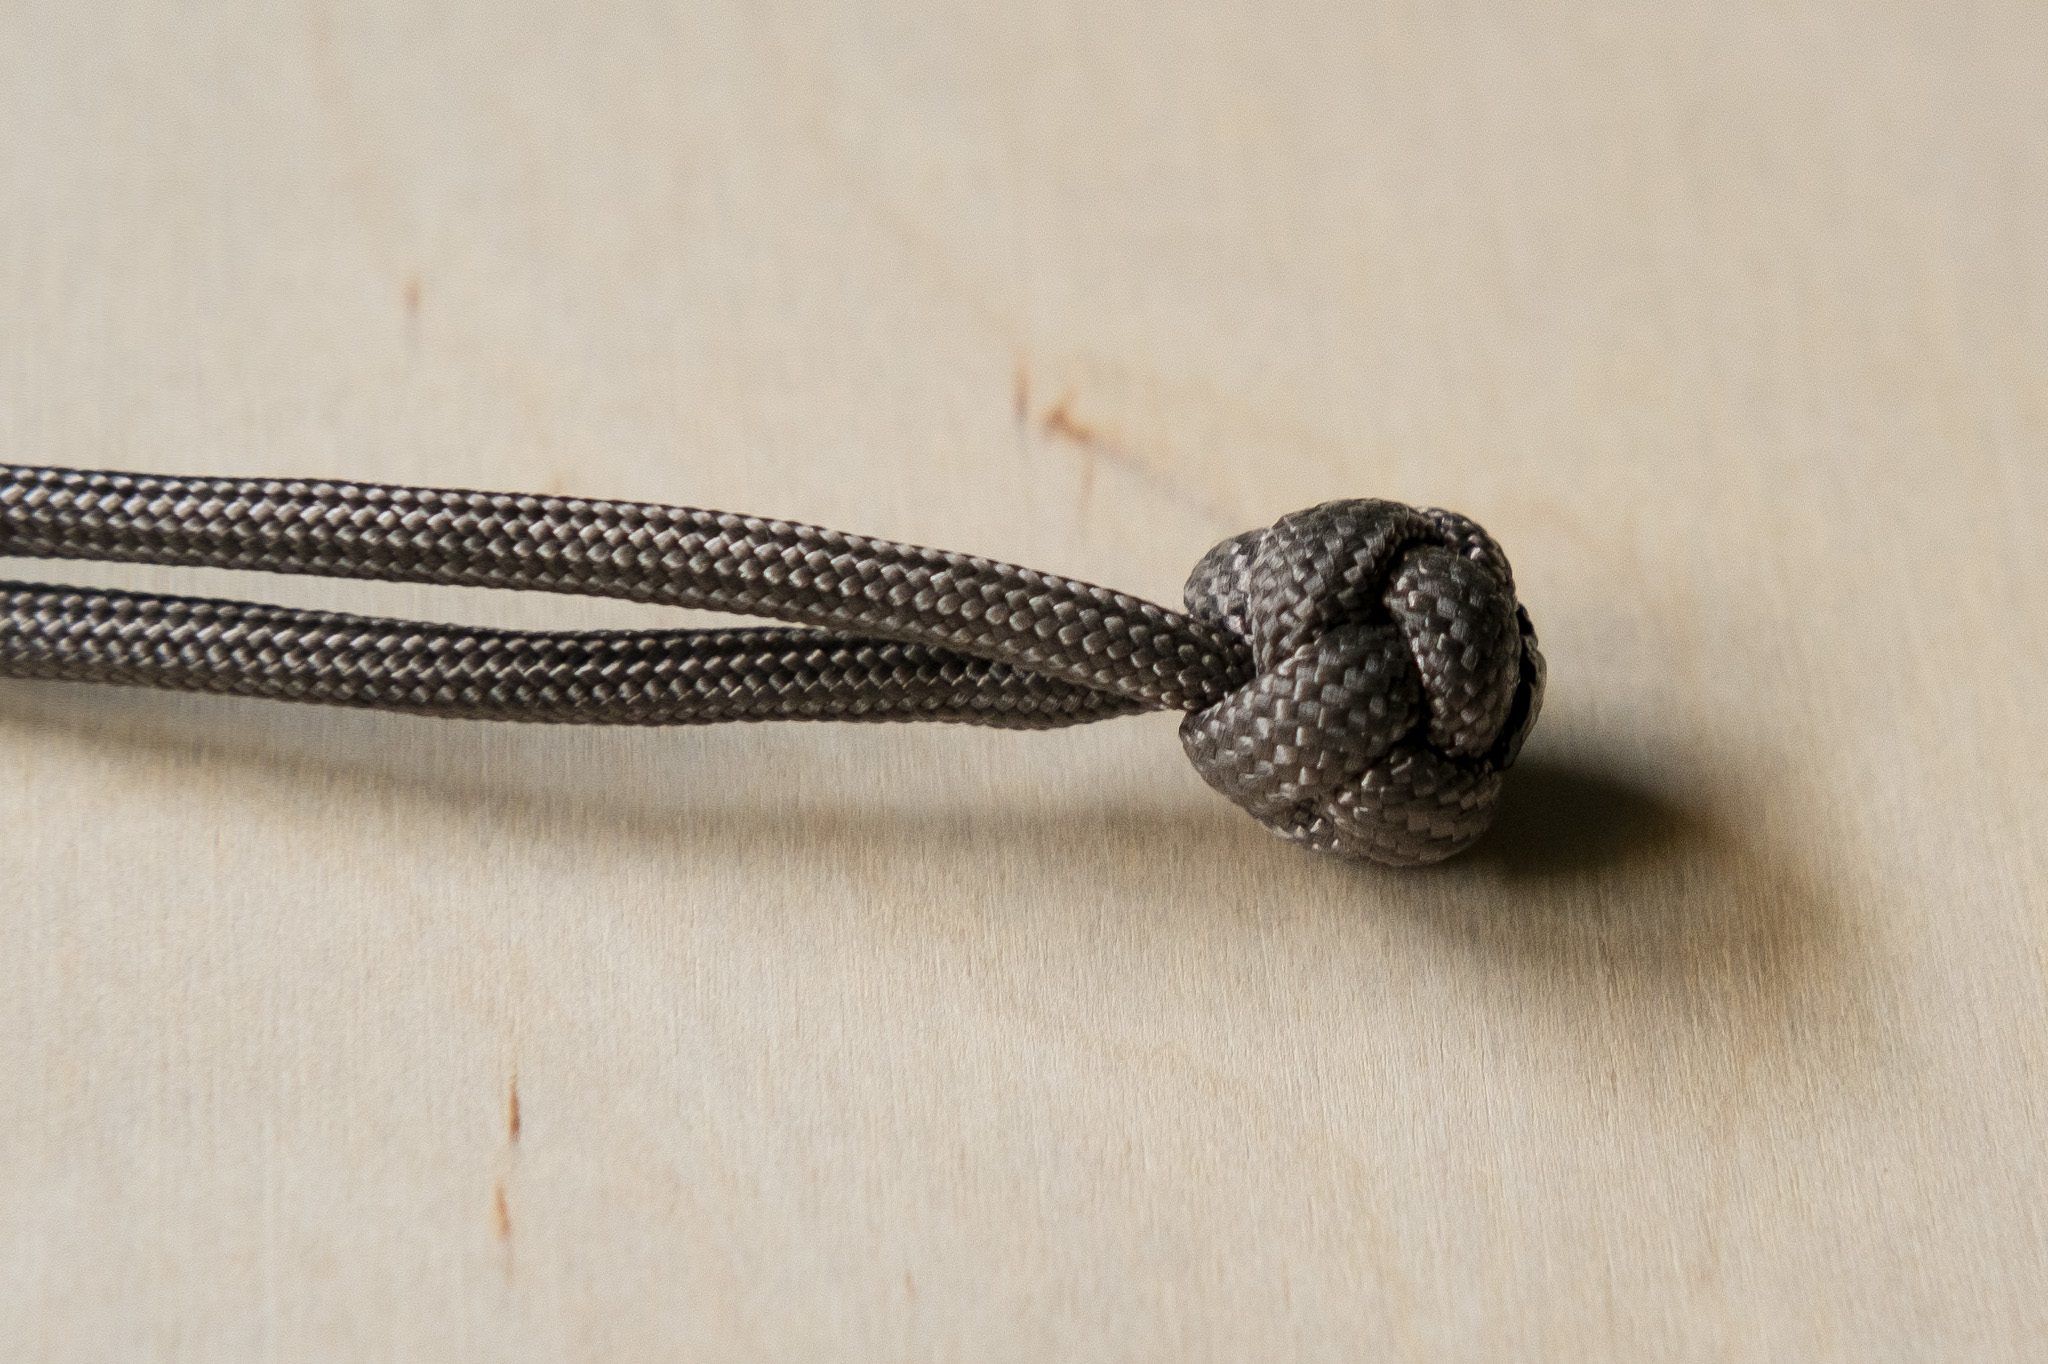
Tie a knot. You can tie a simple overhand knot at the end. Our preference would be something a little bigger that you can hold onto, like a lanyard knot.
This is a lanyard knot. It looks a little more “finished”.
Finish the loose ends. Clip the loose ends of the string, then melt with a lighter so they don’t fray.
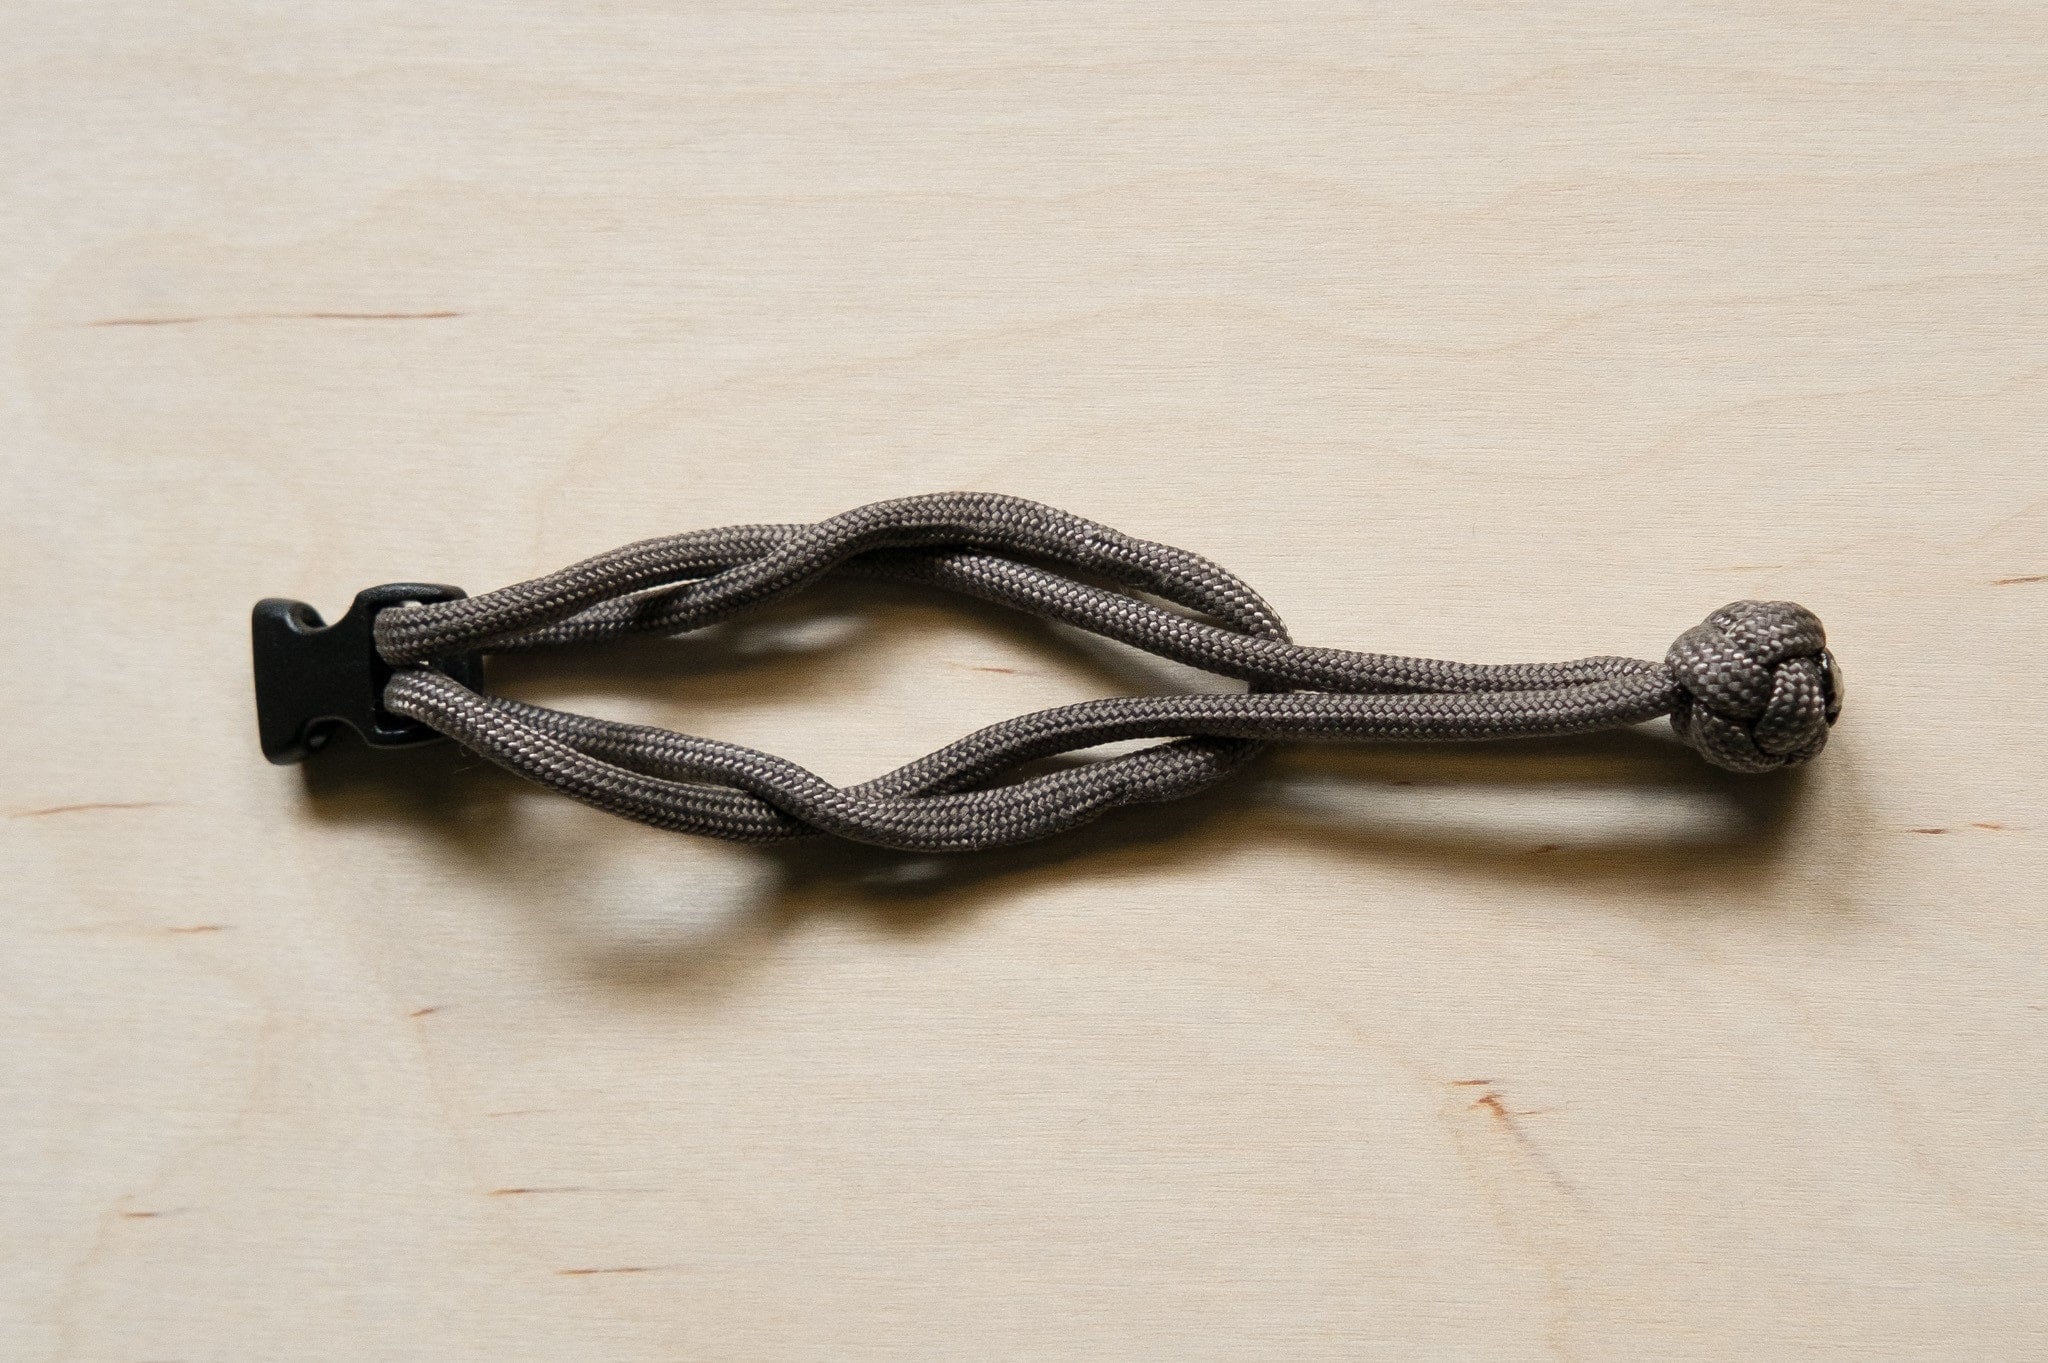
Attach it to the female connector. Feed the loop end through the connector. It’s easier if you use a loop of string or dental floss to pull it through. You could loop it once around (like the way the string attaches to the strap lug) or you could do something a little bit more decorative, like this: Feed the loop through the middle, then over the lanyard knot.
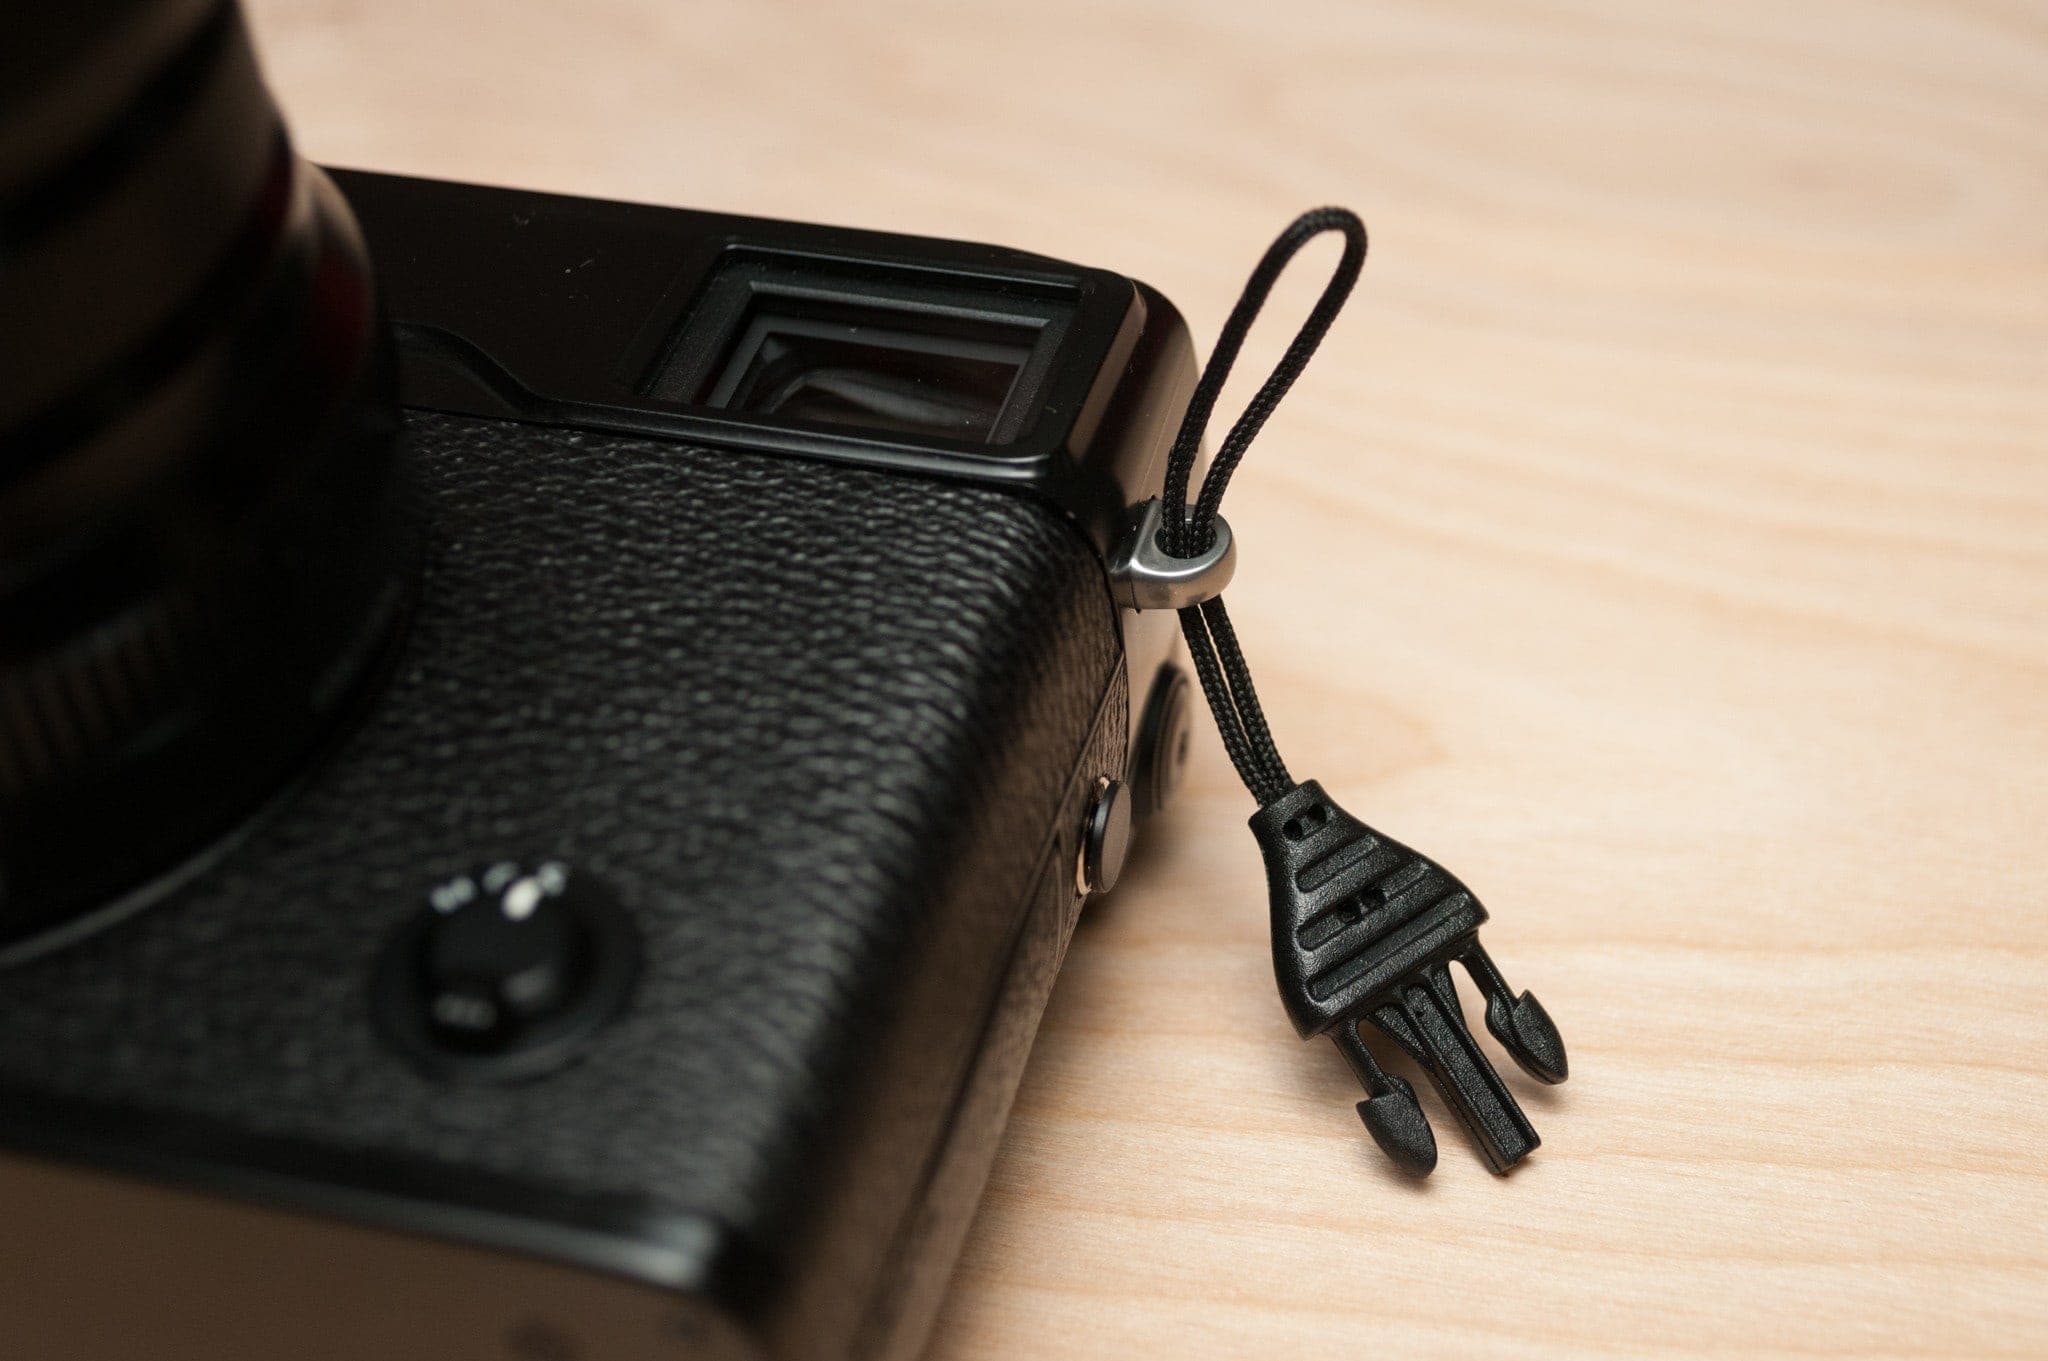
Cinch it and you’ll end up with this.
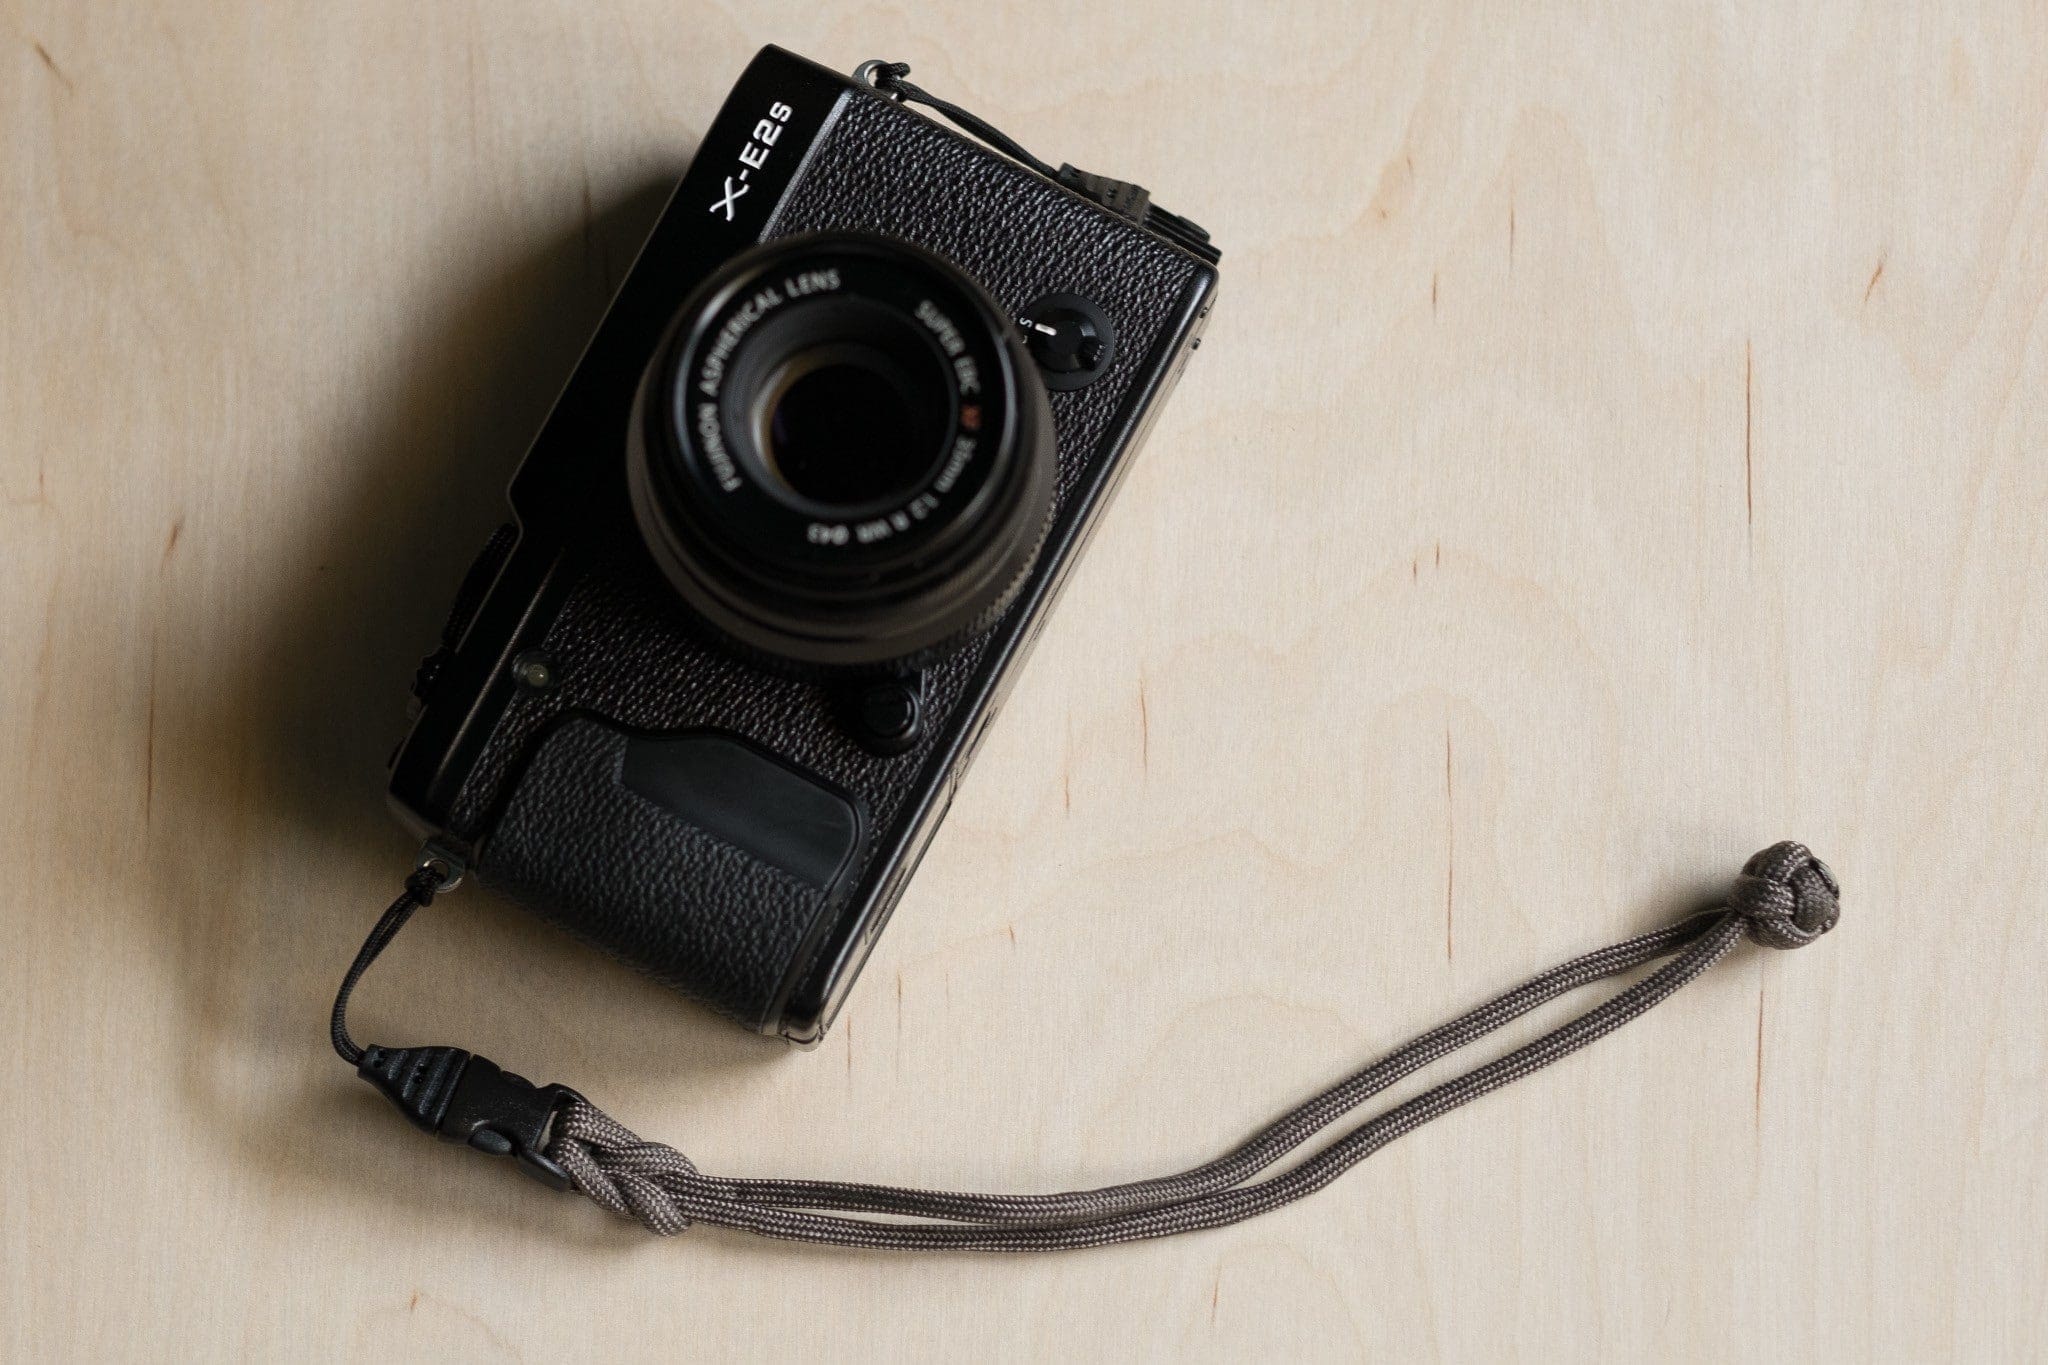
DIY Paracord Camera Wrist Strap attached to Fujifilm X-E2s
The quick-connectors we use on our M1a and M1w straps are Op/Tech USA Mini QD Loops™ (They come in 1mm and 1.5mm versions, but we only use the stronger 1.5mm version).
We’re often asked if they release accidentally. We’re happy to report, we’ve never seen or heard of this happening. To release them, you have to apply significant pressure to both sides — simultaneously. It’s virtually impossible for them to release unintentionally.
We’ve found them to be small, strong (check out our strength test) and reliable, but don’t just take our word for it — They have a 4.6 rating on Amazon with 250+ reviews.
If you’d like to use your M1 Series strap on more than one camera, or just want some spares, we sell them here.
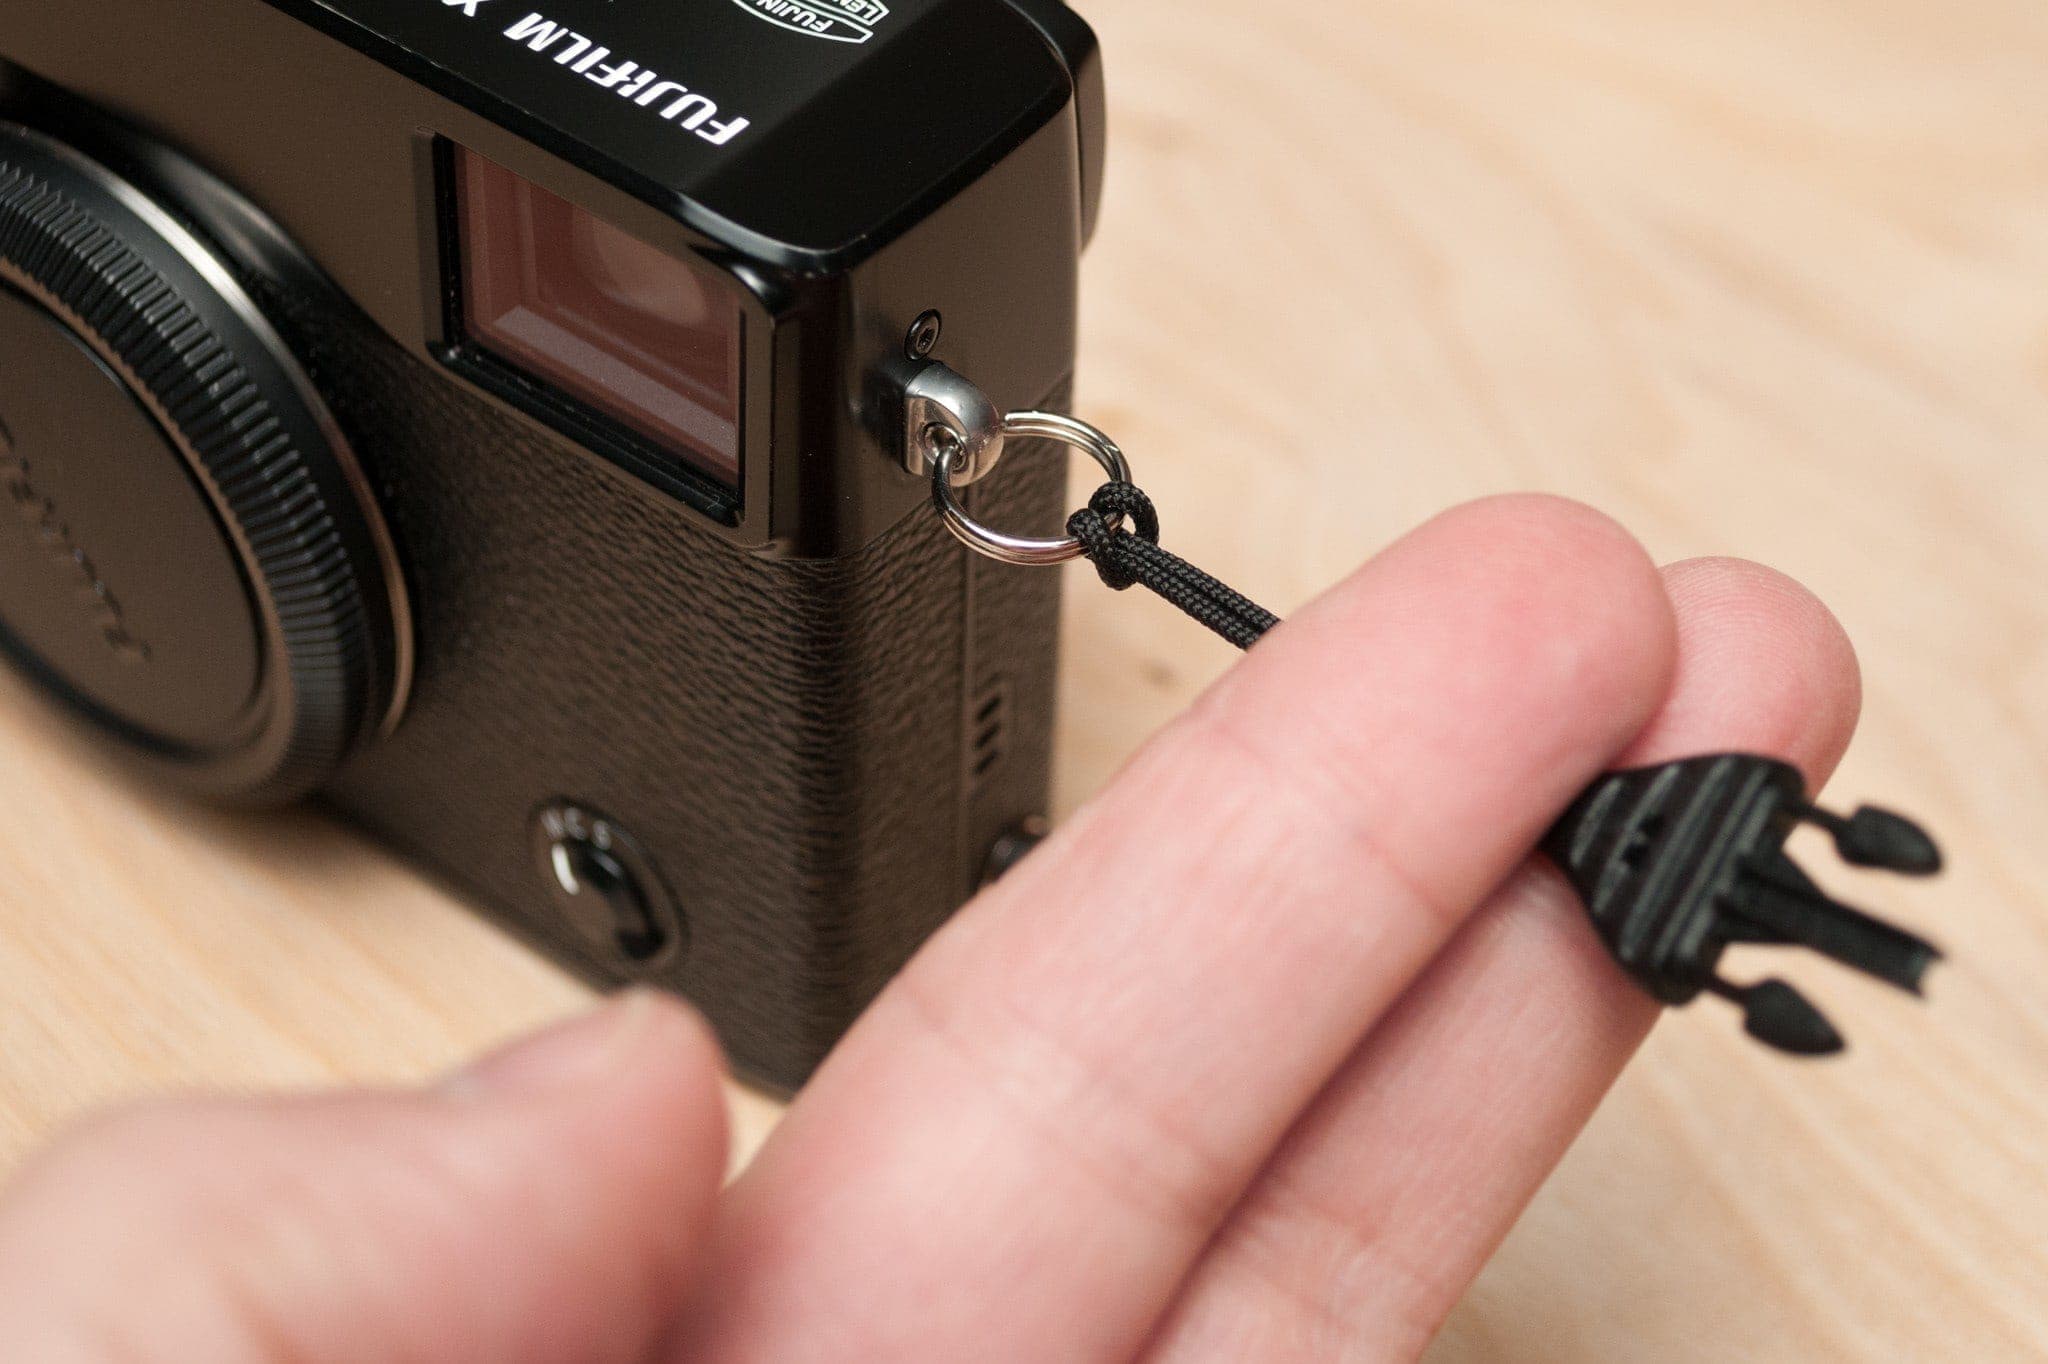
Unless you’re 100% certain that your camera has smooth lugs, it’s best that you attach Mini QD Loops via split rings. Furthermore, we suggest that you use ours, as they’re uniquely designed to work beautifully with the cord loops (much better than the triangular ones).
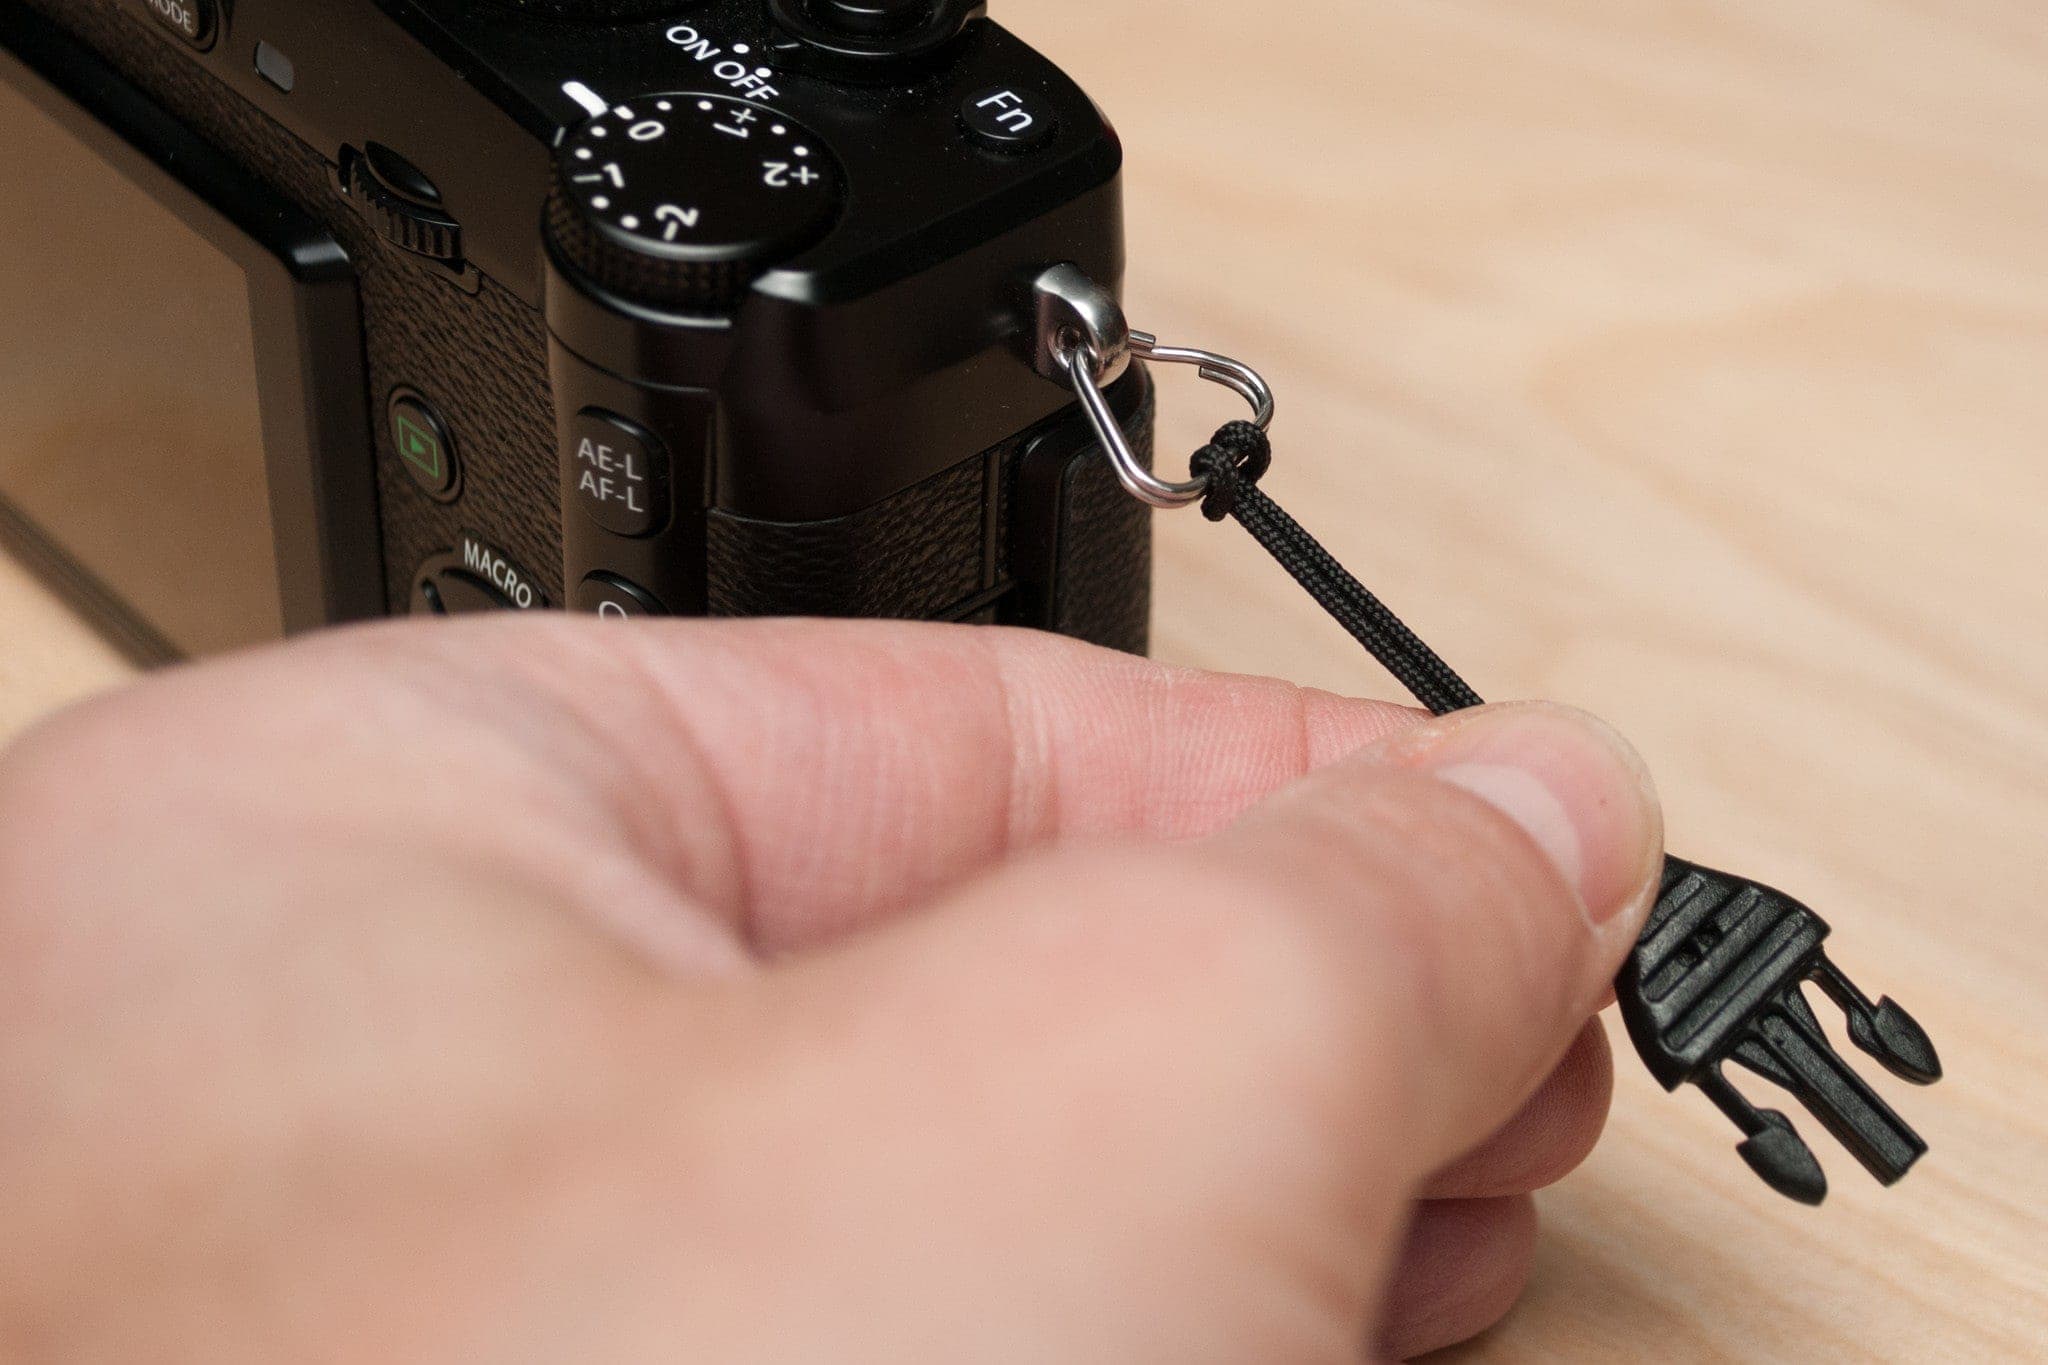
1. Thread the cord loop through the split ring.
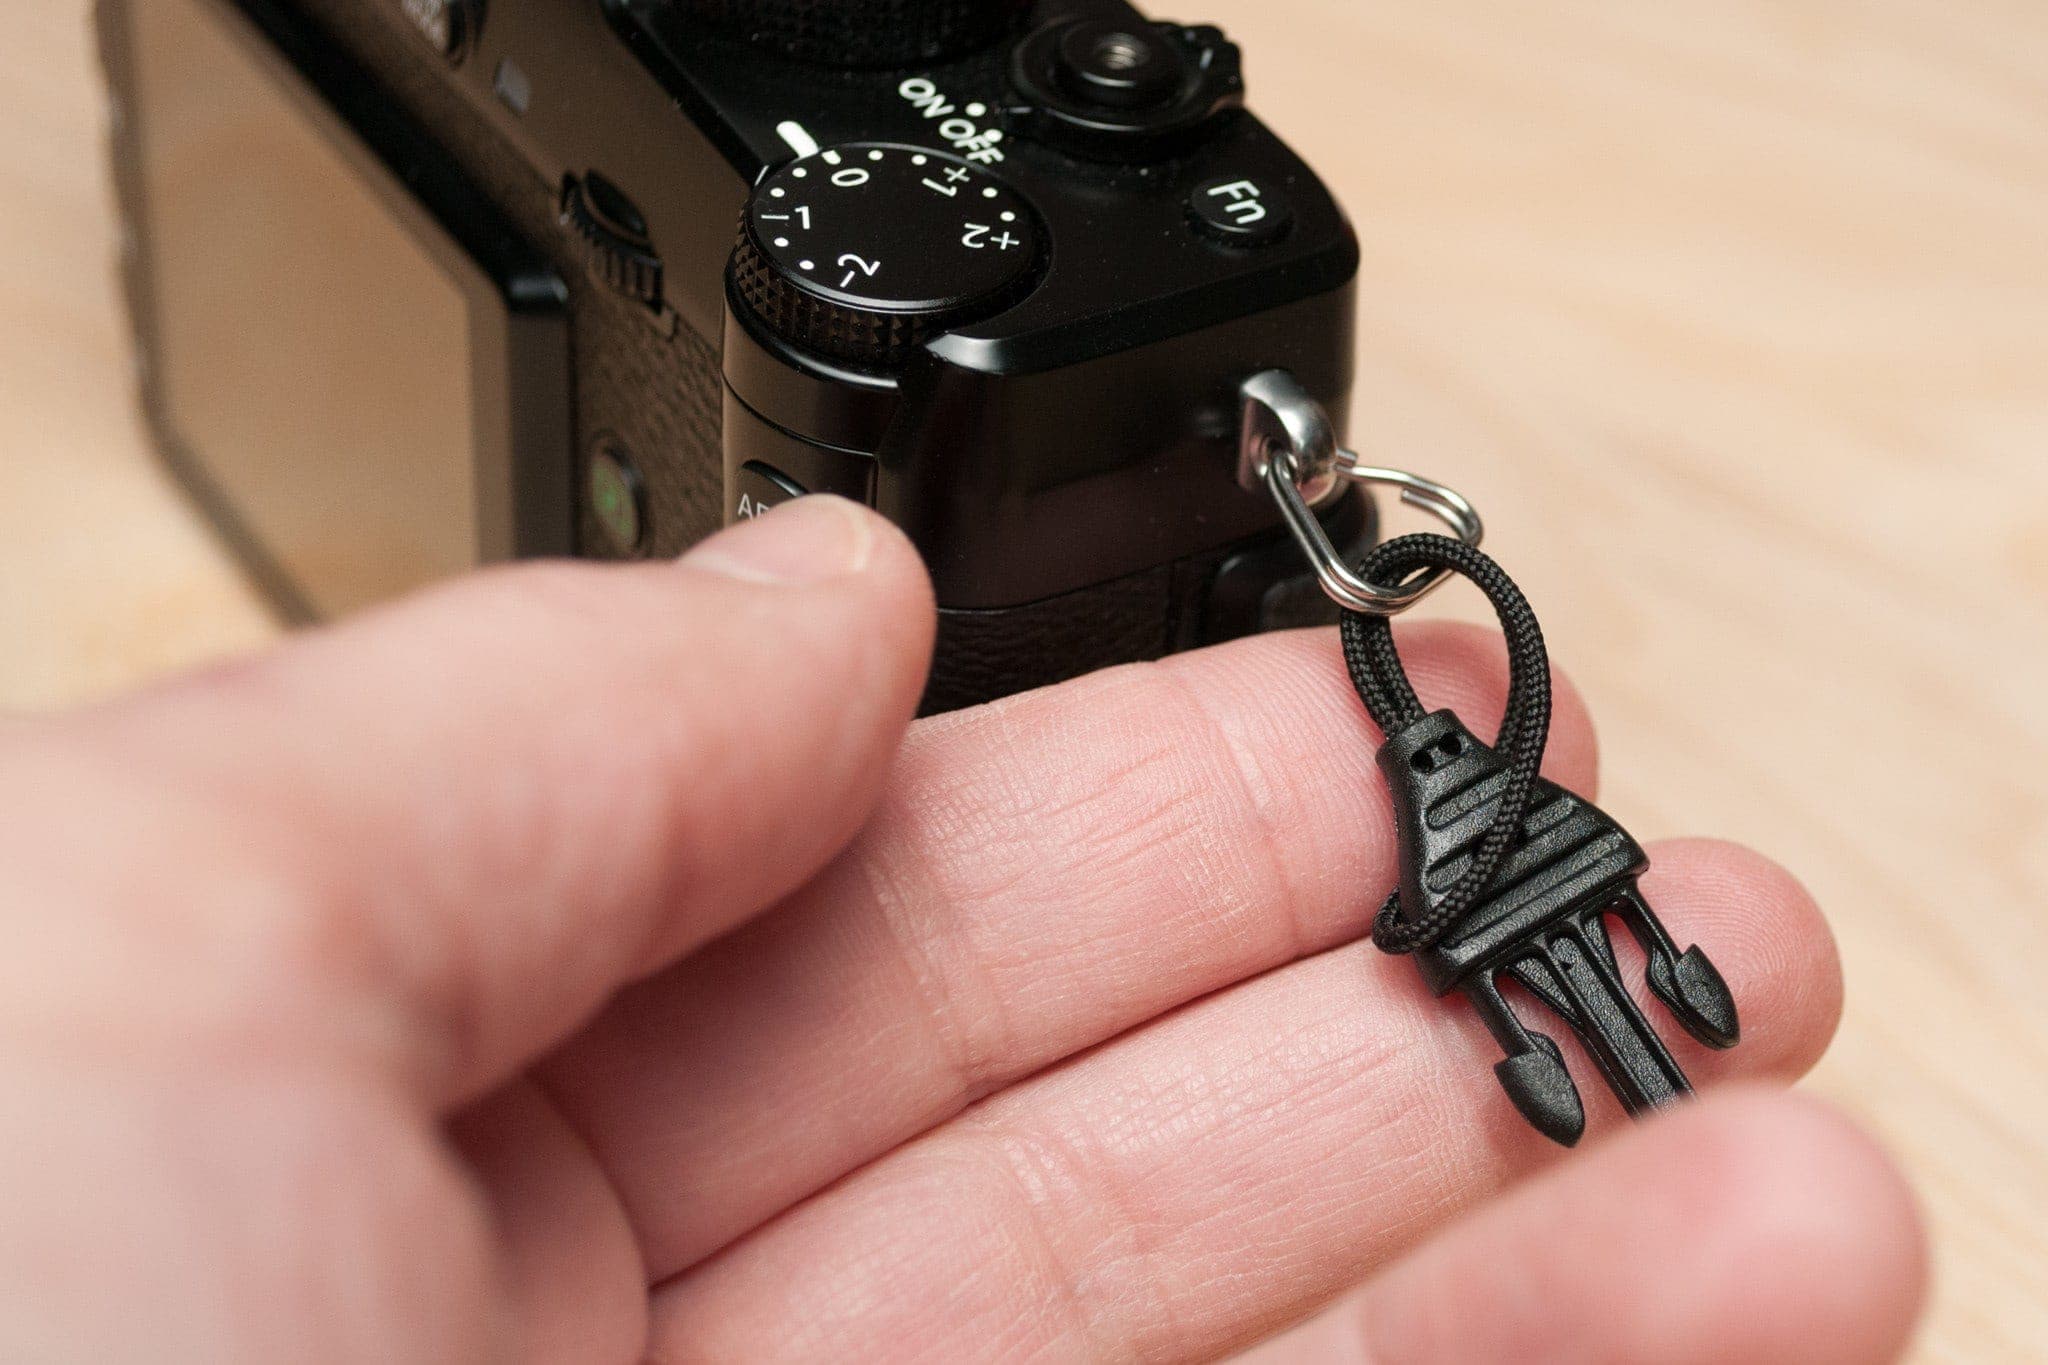
2. Thread the mini quick-disconnect through the loop.
3. Pull the mini quick-disconnect to cinch the loop.
If your camera came with triangular split rings, we strongly recommend replacing them with round ones.
We make some really excellent round split rings that work perfectly with Mini QD loops, and don’t get twisted up like triangular split rings.
Unless you’re 100% certain that your camera has smooth lugs, it’s best that you attach Mini QD Loops via split rings, as outlined here.
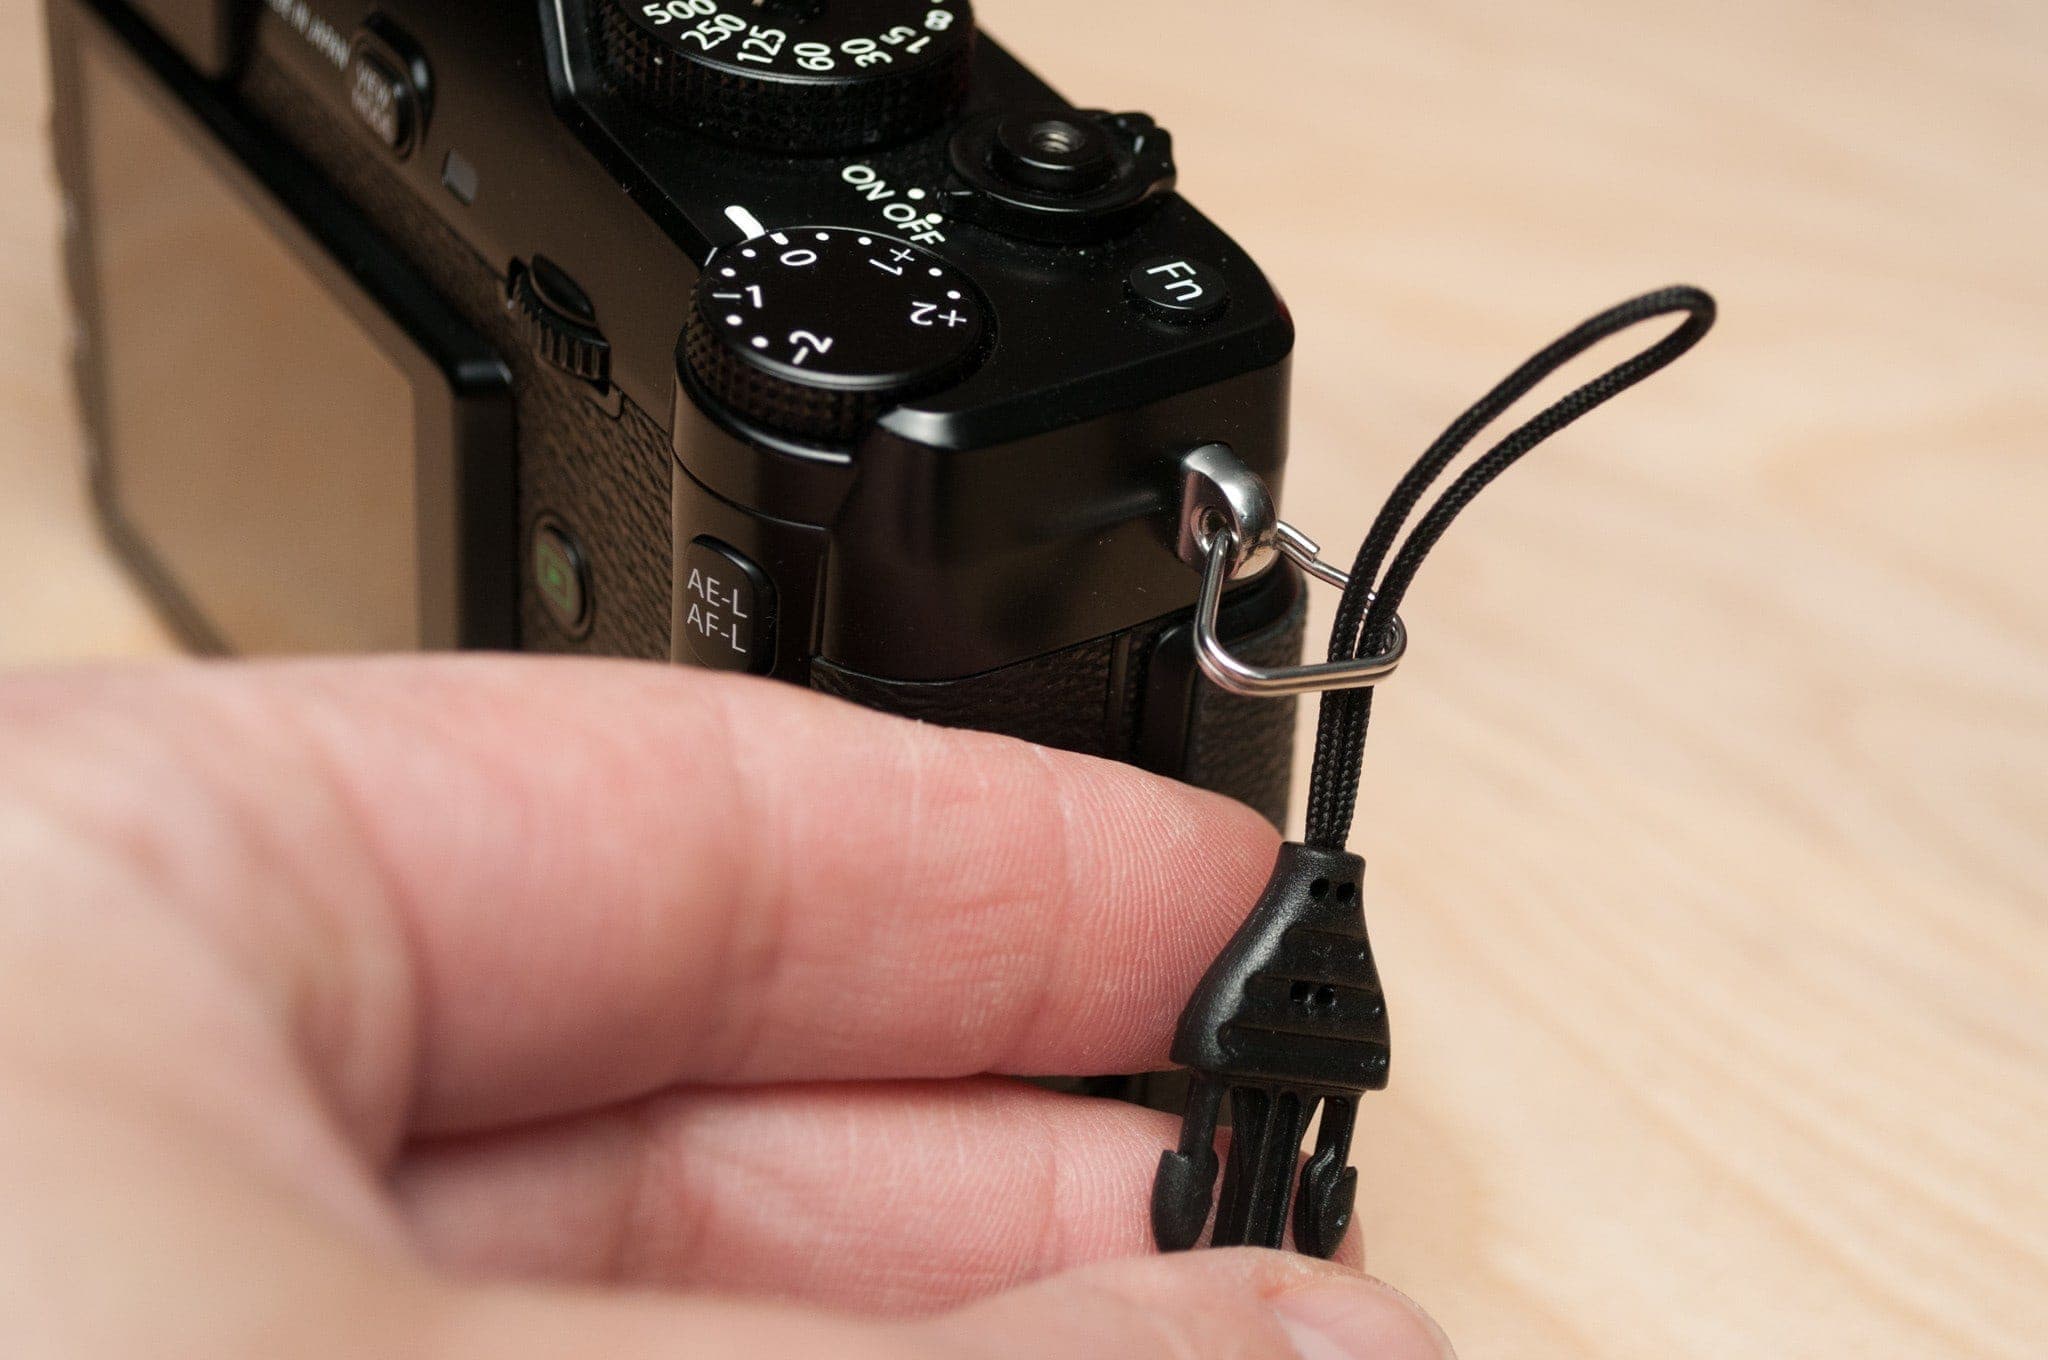
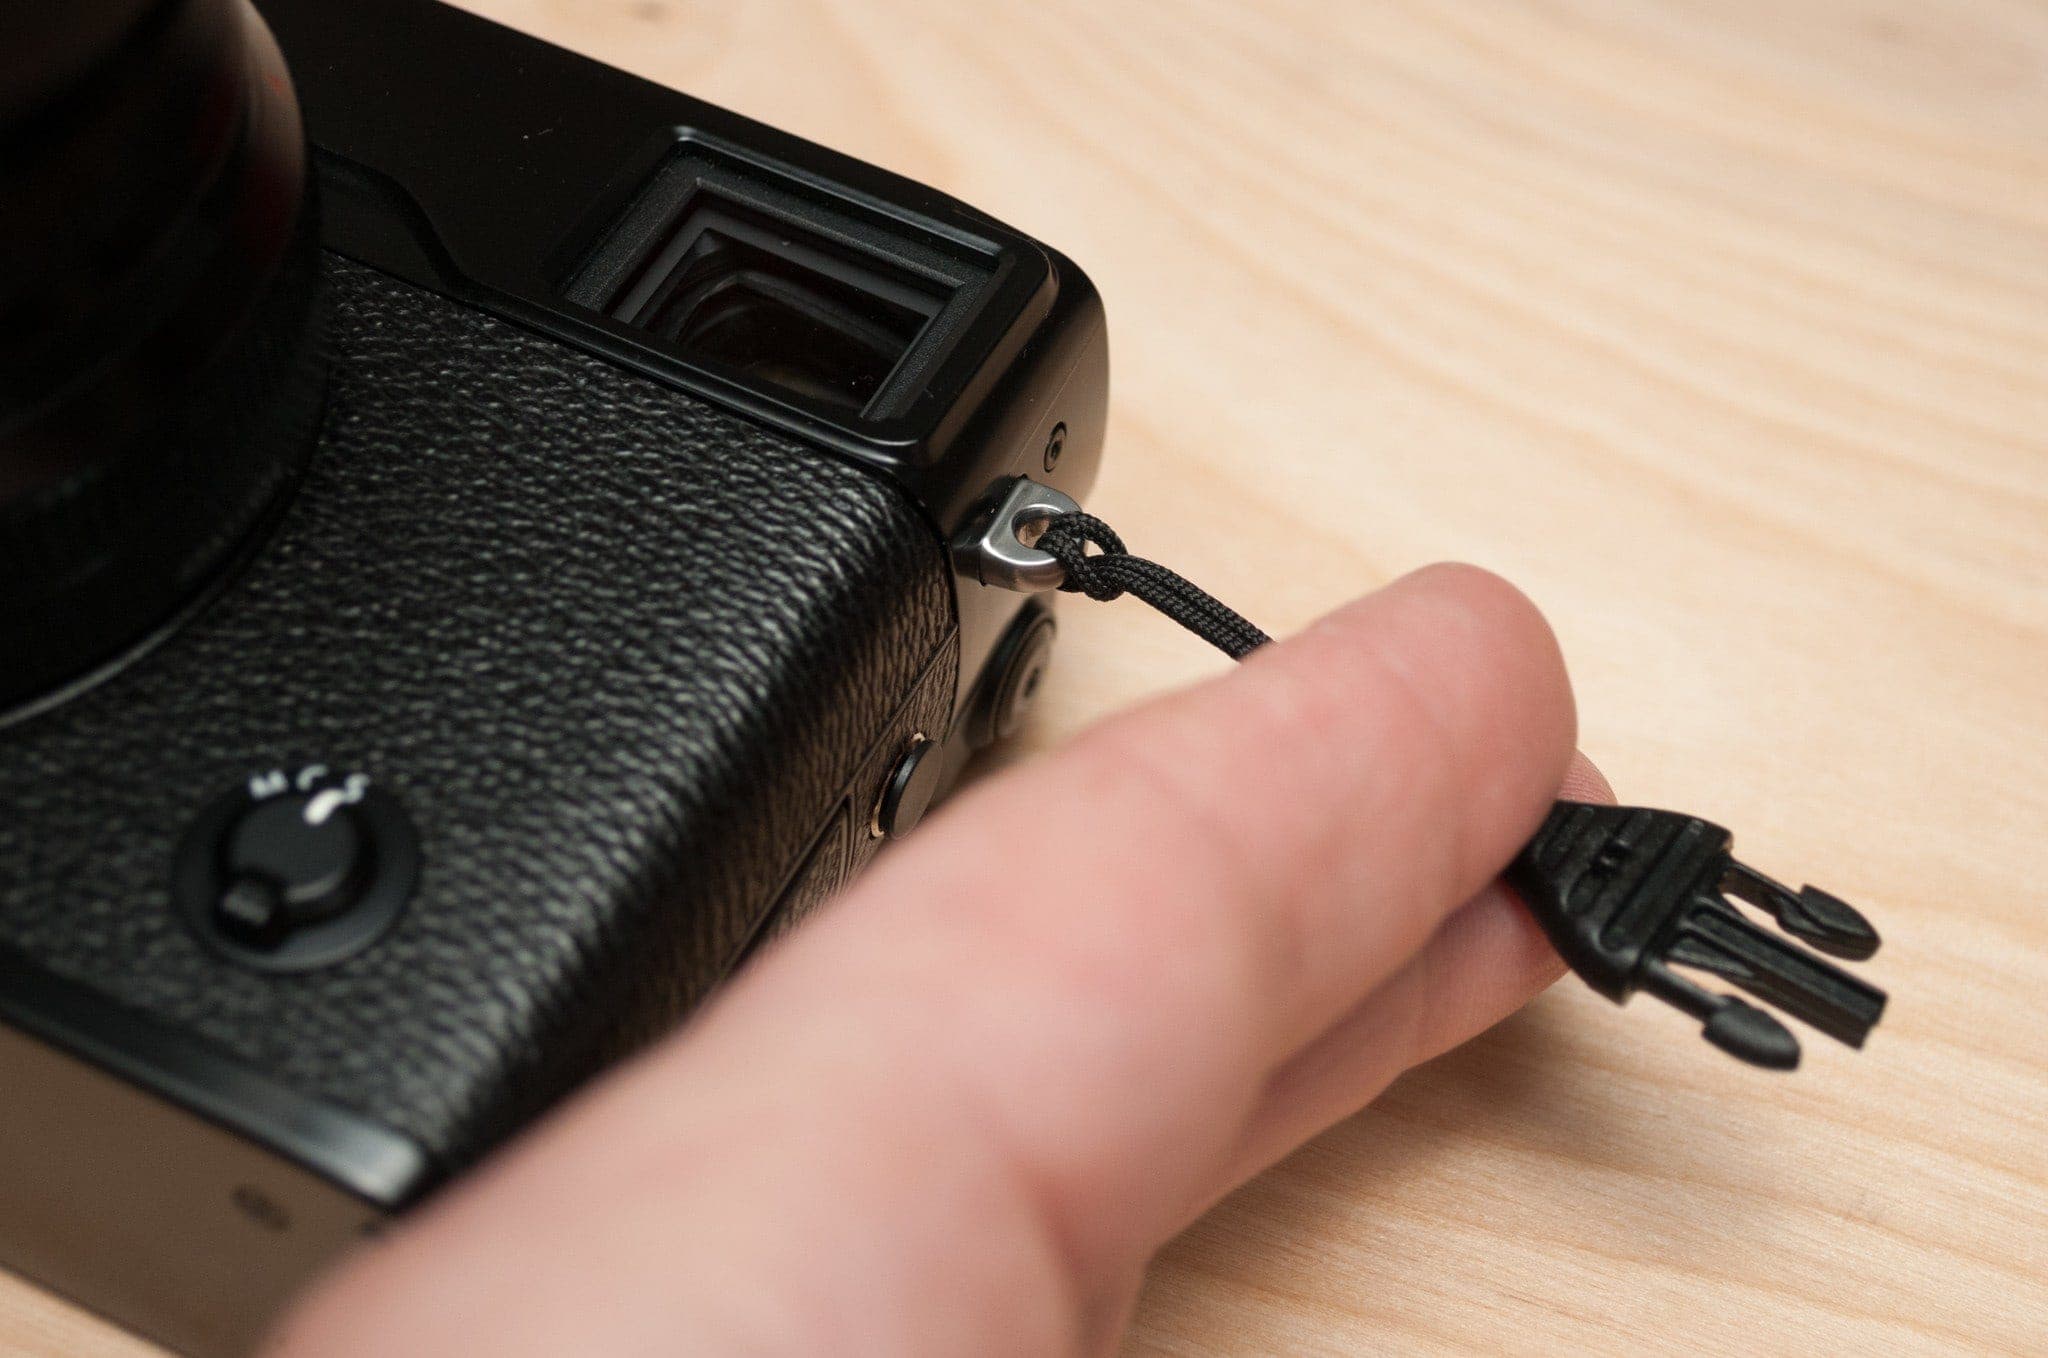
1. Thread the cord loop through the strap lug. It might help to use a piece of string or dental floss.
2. Thread the mini quick-disconnect through the loop.
3. Pull the mini quick-disconnect to cinch the loop.
Shipping Information
Unless noted otherwise, orders consisting of in-stock items typically ship within 2 business days from our workshop in New Jersey, USA zip code 07821. You’ll receive a shipping confirmation email (with tracking number if available) when your package ships. All transit times are estimates.
US
USPS First Class — $4.50 (Free on US orders $25+)
Usually 2–3 days transit time; Tracking
USPS Priority Mail — $8.50
1–3 days transit time; Tracking
Worldwide
On orders destined outside the US — Simplr isn’t responsible for any additional customs clearance, duty, taxes or fees which may be assessed by your local government and/or couriers. To determine whether or not such fees are applicable, and estimate their cost — consult your country’s trade regulations, local postal carrier (to whom GlobalPost entrusts final delivery), and/or DHL office. Products returned to us due to non-payment of such fees will be refunded when and if received, but shipping fees are non-refundable. Delivery addresses must be provided in roman characters, regardless of destination country.
GlobalPost Standard — Starting at $12 (calculated at checkout)
Up to 30 days transit time; Basic tracking — Cost-effective worldwide delivery using Stamps.com’s global postal carrier network
DHL Express — Starting at $29 (calculated at checkout)
Found on: most Canon; entry- and mid-level Nikon; Fujifilm X-H2(S), X-E4, GFX 50S (connect strap to Fuji-supplied attachment clips), X-T100, X-A Series; vintage Rolleiflex. Also known as slotted or rectangular mount.
Found on: any camera that came with triangular or round split rings (remove them); most Fujifilm; pro-level Nikon; Leica; Olympus; Sony; most vintage 35mm cameras; Also known as round or ring mount.